Dec 17, 2011

Script All the Stored Procedures, Views, Triggers and Functions from The Database

4 comments

In my previous post I have show you how to generate database script using Wizard. In this article I will show you how to generate script for database object programmatically or using query

In SQL Server 2005/2008 Management studio you can script all the database object using ‘SQL Server Script Wizards’. But sometime we do not have the permission to generate a script using wizard then we are help less. But don’t worry now we have a solution for that as well. I will show you how to script all database objects programmatically.

To script All the Stored Procedures from the Database:

DECLARE @ScriptText As VARCHAR(MAX) = ''
DECLARE @AllScriptText As VARCHAR(MAX) = ''

DECLARE script_sp CURSOR FOR
SELECT SM.Definition
FROM SYS.SQL_Modules As SM INNER JOIN SYS.Objects As Obj
ON SM.Object_ID = Obj.Object_ID WHERE Obj.Type = 'P'
OPEN script_sp

FETCH NEXT FROM script_sp INTO @ScriptText

WHILE @@FETCH_STATUS = 0
BEGIN
        --Set @AllScriptText =  @AllScriptText + 'go' +@ScriptText;
        Print @ScriptText;
        FETCH NEXT FROM script_sp INTO @ScriptText
END
--Select @AllScriptText;
CLOSE script_sp
DEALLOCATE script_sp

But Remember if you have created all the procedure with encryption then you will get the null value.

 Now suppose you want all the views as a script then use below query,

DECLARE @ScriptText As VARCHAR(MAX) = ''
DECLARE @AllScriptText As VARCHAR(MAX) = ''

DECLARE script_sp CURSOR FOR
SELECT SM.Definition
FROM SYS.SQL_Modules As SM INNER JOIN SYS.Objects As Obj
ON SM.Object_ID = Obj.Object_ID WHERE Obj.Type = 'V'
OPEN script_sp

FETCH NEXT FROM script_sp INTO @ScriptText

WHILE @@FETCH_STATUS = 0
BEGIN
        --Set @AllScriptText =  @AllScriptText + 'go' +@ScriptText;
        Print @ScriptText;
        FETCH NEXT FROM script_sp INTO @ScriptText
END
--Select @AllScriptText;
CLOSE script_sp
DEALLOCATE script_sp

Now suppose you want all the functions as a script then use below query,

DECLARE @ScriptText As VARCHAR(MAX) = ''
DECLARE @AllScriptText As VARCHAR(MAX) = ''

DECLARE script_sp CURSOR FOR
SELECT SM.Definition
FROM SYS.SQL_Modules As SM INNER JOIN SYS.Objects As Obj
ON SM.Object_ID = Obj.Object_ID WHERE Obj.Type = 'FN'
OPEN script_sp

FETCH NEXT FROM script_sp INTO @ScriptText

WHILE @@FETCH_STATUS = 0
BEGIN
        --Set @AllScriptText =  @AllScriptText + 'go' +@ScriptText;
        Print @ScriptText;
        FETCH NEXT FROM script_sp INTO @ScriptText
END
--Select @AllScriptText;
CLOSE script_sp
DEALLOCATE script_sp

If you need to generate a script for all the triggers from the database then we have to make little bit changes in query. We will join sys.triggers table in place of sys.objects as below.

DECLARE @ScriptText As VARCHAR(MAX) = ''
DECLARE @AllScriptText As VARCHAR(MAX) = ''

DECLARE script_sp CURSOR FOR
SELECT SM.Definition
FROM SYS.SQL_Modules As SM INNER JOIN SYS.triggers As Obj
ON SM.Object_ID = Obj.Object_ID
OPEN script_sp

FETCH NEXT FROM script_sp INTO @ScriptText

WHILE @@FETCH_STATUS = 0
BEGIN
        --Set @AllScriptText =  @AllScriptText + 'go' +@ScriptText;
        Print @ScriptText;
        FETCH NEXT FROM script_sp INTO @ScriptText
END
--Select @AllScriptText;
CLOSE script_sp
DEALLOCATE script_sp

Happy Scripting…….


read more

Nov 26, 2011

SQL Server – 2008 – Generate Script of Database, Generate script to copy whole database schemas and All other object in database, like Tables with data, SPs, Views, Triggers, Functions, Database constraints etc.

4 comments

Check how to create a script using T-SQL

While we are working on any project and uses SQL Server as a database, we often need to copy database schema either with data or without data to create database on other server. So it inspires me to write down the blog post about ‘how to generate SQL script using SQL Server Management Studio
Here I will explain step by step process with screen shot that how we can copy database schema with all the database objects.
First of all open SQL Server Management Studio and expand databases node like below images step 1.

Step 1
Now select the database for which you want to generate SQL Script as like below image Step 2. Here I have selected pubs database for demo. Right click on selected database, click on Tasks option and then click Generate Scripts...  I have marked option with red circle in image.

Step 2
Once you click on Generate Scripts option from above image it will show up the below image step 3
Just click on the next button from below image step 3

Step 3
Now in below image you can see the list of all the available databases, by default on which database you have right clicked it is selected but you can change here if you want to generate script for other database. In Step 4 image there is one check box labelled with ‘Script all objects in the selected database’.  Check this check box if you want to generate script for all the objects from database, if you will not check this check box it will ask on next step for database object selection.
  
Step 4
After selecting the database and checking check box it will show up the below image step 5.
Here you can select what you want to include in script, like script table with data or without data, you want to add script like if exist then drop the object first then create it etc. For scripting table with all the data select true in script data option as I have selected in below image. Then click on next button.

Step 5
Now this step 6 has some output file type and file location related options. I have selected 3rd radio button in below image for generating a script in New Query Window but if you don’t want to generate script in new query window and want to generate script into clipboard then select 2nd radio button labelled with Script to Clipboard. If you want to generate script in a file then select 1st radio button Script to file, once you select this option it will ask file name and directory to save the file on hard drive.
I have marked files to generate option as a 3 and then 3.1 and 3.2 in the red colour. If you want to generate whole script in one single file then select single file (3.1), by default it is selected. If you want to generate different file per object then select 3.2 option. If you select 3.2 option and suppose you have 10 tables in database then it will generate 10 different SQL file.

Step 6
Step 7 below image is just a summary page, showing all the options you have selected till step. Just click on the finish button to proceed.

Step 7
Step 8 showing the progress for generating database script

Step 8
Step 9 showing the successfully completion of script generation process.

Step 9
Step 10 shows that all database object has been scripted in new query window for pubs database. Now your script is ready...

Step 10
Please let me know if you have any question on this script generation wizard.

read more

Nov 20, 2011

Error: A network-related or instance-specific error occurred while establishing a connection to SQL Server.

2 comments

Error: A network-related or instance-specific error occurred while establishing a connection to SQL Server. 
The server was not found or was not accessible. Verify that the instance name is correct and that SQL Server is configured to allow remote connections. 
(provider: SQL Network Interfaces, error: 26 - Error Locating Server/Instance Specified)


This is the common error for sql server while establish connection from visual studio to sql server.


If you encounter this error, while establishing connection from visual studio to to sql server, than first things to check in web.config file that have you set sql server instance name properly and correct?


You can encounter above error if you have 


Change your PC name or sql instance name
or you have installed new isntance of sql server.


EG. Currently your PC name is 'PCName', and sql instance name is 'SQLServer'
Now you are changing your computer name from 'PCName' to 'MyPC' or sql server instance name from 'SQLServer' to 'MySQLServer' then you must change connection string 
in your web.config file  like below sample connection string


Old Connection String:
Data Source=PCName\SQLServer;Initial Catalog=SampleDBName;Integrated Security=True


New Connection String:
Data Source=MyPC\MySQLServer;Initial Catalog=SampleDBName;Integrated Security=True


Solution:
First check your sql server instance name after opening sql server management studio, then check connection string in your vs.net solutions,
then compare both instance name if both instance name are not same then please make both name same and save changes you made in web.config file and run the project

read more

Oct 19, 2011

How to display Image in Repeater Control from folder?

2 comments
Download full project
 
Recently I was working on a project where I needed to dispaly an images into Repeater control from Folder. So I thought let me create a blog post for that and share it with my reader.
It is very simple to display an image into repeater control from folder just like below.
In this project  I have used one file upload control from where we are uploading images to one specific folder and then display all the uploaded images to the repeater control using an array.

Here is html code for  .aspx page
 
<html xmlns="http://www.w3.org/1999/xhtml">
<head runat="server">
    <title>Untitled Page</title>
    <style type="text/css">
    #lblErrorMessage{color:#FF0000;}
    </style>
</head>
<body>
    <form id="form1" runat="server">
    <div>
        <asp:Label ID="lblErrorMessage" runat="server" EnableViewState="false"></asp:Label>
        <asp:FileUpload ID="fuUpload" runat="server" />
        <br />
        <asp:Button ID="btnFileUpload" runat="server" Text="Upload File" 
            onclick="btnFileUpload_Click" />
    </div>
    <div>
        <asp:Repeater ID="rptImage" runat="server" Visible = "true">
            <ItemTemplate >
                    <img ID="imgLeft" runat="server" src='<%# Container.DataItem %>' alt='' style="height:100px;width:100px;" />
            </ItemTemplate>
        </asp:Repeater>
    </div>   
    </form>
</body>
</html>

Here code sample is explained in small peices.

    Page Load Event
    In page load event just calling a bindImages which will find all the images from folder and then bind it to the Repeater.
   
    string folderPath = "images/";
    protected void Page_Load(object sender, EventArgs e)
    {
        BindImages(folderPath);
    }

//bindImages Function
In below function we are getting all the images to the string array then loop through it and get the file name from whole path and concat it with folder path and again assign it to array element. Once all the image path changed then bind an file path array to the Repeater.

 public void BindImages(string folderPath)
    {
        //get all the files from flder
        string[] strImgs = System.IO.Directory.GetFiles(Server.MapPath(folderPath));
        //Loop through all the file and get only file name and concat it with folder name
        for (int count = 0; count < strImgs.Length; count++)
        {
            string filePath = strImgs[count];
            filePath = filePath.Substring(filePath.LastIndexOf('\\')+1);
            string newFilePath = folderPath + filePath;
            strImgs[count] = newFilePath;
        }
        // Bind an image file name to repeater.
        rptImage.DataSource = strImgs;
        rptImage.DataBind();
    }

When save button clicked then this code will check that file is selected or not, based upon file selected it will take an action.

 //Before procceding check that user has select file
 
        if (fuUpload.HasFile)
        {
            //Call save File method
            SaveUploadedFile(fuUpload.PostedFile);
            BindImages(folderPath);
        }
        else
        {
            // Notify user that file is not selected
            lblErrorMessage.Text = "Please select a file to upload.";
        } 
 
        Code for SaveUploadedFile function
below code will create a folder path to save image to the disk then check that the file name is exist in target folder if yes then it will contact counter number at begining of the file name and again check for duplicate file name, once file name found then it will save image with that file name on the disk.
     
    void SaveUploadedFile(HttpPostedFile file)
    {
        // Secify the path to save file.
        string savePath = Server.MapPath("Images/");
        // Get the name of the file to upload.
        string fileName = fuUpload.FileName;
        string pathToCheck = savePath + fileName;
        string tempfileName = "";
        // Check at target that file is exist with same name then change filename while saving
        if (System.IO.File.Exists(pathToCheck))
        {
            int counter = 1;
            while (System.IO.File.Exists(pathToCheck))
            {
                tempfileName = counter.ToString() + fileName;
                pathToCheck = savePath + tempfileName;
                counter++;
            }
            fileName = tempfileName;
        }
        else
        {
            lblErrorMessage.Text = "Your file was uploaded successfully.";
        }
        savePath += fileName.Replace(" ","");
        //save uploaded file to disk
        fuUpload.SaveAs(savePath);
    }

 Here I have uploaded full project code for the reference. You can download it from the top


Output:


read more

Jun 28, 2011

How to make Firefox the default browser?

comments
If you have more then one browser like IE, FF, Safari or Chrome then windows or any other operating system needs to know which browser to use by default?

This article will show you the step how to set firefox as default browser.
From the menu bar select on ToolsOptions and it will open following screen


Figure 1
As per above figure select advance option from options then go to General tab.

In the system defaults panel there is a button with captions Check Now Just click it and it will ask for the confirmation, click on OK button and you are done. You can see confirmation dialog box like Figure 2


Figure 2.
Note: MSN Messenger and other applications may open Internet Explorer regardless of which browser is the default. Also, Internet service providers like PeoplePC Online, Juno and NetZero may provide connection software that automatically launches Internet Explorer.


read more

Jun 7, 2011

Table and Stored Procedure helptext using Keyboard - SQL Server Keyboard Shortcut

comments

In the world of programming keyboard shortcuts are very useful for fast developing either in SQL server, DotNet or any programming language or any database.
In my project I always use SQL Server for backend and for editing or viewing SP or Database Table structure I used right click on Database object and then select either design as Figure 1 or modify as Figure 2 option. But it’s little bit lengthy procedure for getting a result.

Figure 1

Figure 2
So I was searching for shortcuts using that we can easily get the desire result and I found that.
How to do that for Table?
In my Sample Database there is one table Customer_Orders. Just  drag that table to query window or copy the name of table and paste it to query window. Then select it and just press Alt+F1 it’s default from Management Studio and it will show each and every details in result area like Figure 3.


 Figure 3

How to do that for Sps?
In my Sample Database there is one Sp getAllOrders. Just  drag that sp to query window or copy the name of sp and paste it to query window.  Append sp_helptext at the beginning of the sp name with space and select all and press F5 key and it will show the result in below pane.
Still it’s required 2 to 3 actions so set some default key for sp_helptext command using below steps.
Step 1 Go to Toolsà Options menu like Figure 4

Figure 4
In Figure 4 from left panel select keyboard option and from right side Ctrl+F1 has empty table cell. Add sp_helptext command there and press ok. Here you can set some keyboard shortcuts if you want like Ctrl+F2, Ctrl + F3 and more
Now open new query window drag sp name on query window and select it and press Ctrl+F1 and you can see result like Figure 5.

Figure 5


Figure 6
Above Figure 5 and Figure 6 both are same but still there is a little and important difference so let me take an opportunity to explain that difference. In Figure 5 the result is displaying in grid and in Figure 6 result is displaying as a plain text. If you check at the top then there is tooltip in yellow strip with text Results to Grid and Results to Text. Both options are at the top of the query window. If you see the result in grid view then you will loose the formation of the sp like indentation, spacing, beautify etc. But if you view result in plain text format then it will preserve all the format when you have created or modified sp.

read more

May 6, 2011

How to Exclude your Own Visits From Blogger Stats?

0 comments
When we are developing any blog or website then normally we want to watch the traffic on our site or blog. There are lots of traffic source tracker sites and tools are available on the net, but I found 2 more effective tools where we can check our traffic stat very easily. 1 is Google Analytic and second one is Blog Stat which is recently launched in blogger platform.

Blogger stats is excellent way to track world wide traffic on you blogger blog. It is now built in facility by http://blogger.com and very much similar to Google Analytic and it will be similar because both are from Google only.

Benefit of Blogger stat
Main benefit of blogger stat is you do not need to add any external code to track your traffic source like hitstat, google analytics, sitemeter etc.

In Google analytic is was easy to exclude your own visits but how to exclude your own visit from blogger stat?

So here the step by step guide to exclude your own visit from blogger stat.

First go to http://www.blogger.com and login there.

From dash board might you have more then 1 blog so find your blog where you want to exclude your stat and click on stat tab on that blog details like below figure 1


Figure 1

Now in overview section(tab) on stat tab there is page view details at right side like pageview today etc under that widget you can see don't track own visit link, see below figure 2


Figure 2

now once you click on that link don't track own visit it will open on small popup with 2 radio button.
Track my pageview and
Don't track my pageview

select second option don's track my page view and click on save button like below figure and you are done. Now blogger will exclude you own visit from traffic source details.


read more

May 5, 2011

How to Prevent or disable copy content of your blog/site

2 comments


If you want that visitor will not be able to copy your content from web page then it's easy using JavaScript.
It's not full proof way there are other alternate they can copy but it will not be easy way for them to copy content by just selecting required content, right click and click on copy.
Just add following JavaScript code to your blog templates and it will be secure that other user will not be able to copy content easily.
Just go to Blogger Dashboard.
Click on Design Tab –> then click on Page element.
Now you can see add a gadget link many places. Just click any one of them and select HTML and Javascript widget and paste following code to opened dialog box.


<script type="text/javascript">
    var donotconsidortag = ["input", "textarea", "select"]
    donotconsidortag = donotconsidortag.join("|")
    function unableToSelect(e) {
        if (donotconsidortag.indexOf(e.target.tagName.toLowerCase()) == -1)
            return false
    }
    function ableToSelect() {
        return true
    }
    if (typeof document.onselectstart != "undefined")
        document.onselectstart = new Function("return false")
    else {
        document.onmousedown = unableToSelect
        document.onmouseup = ableToSelect
    }
</script>

Then save the templates and check it. If it's working fine then you are done else you have made some mistake, to correct it repeat the process.

Enjoy the post. If you like my post then either left a comment or do subscribe my rss in you favourite rss feed reader to get latest update from me.

read more

May 1, 2011

Generating a random number in JavaScript

0 comments

Today I was working in a DayPilot project it was something like Google or outlook calender. In that project when I was creating or editing event, it was using java script popup. But it was showing old value rather than new or updated value when popup open. This was happening due to JavaScript because it was running from cache. 
How to fill new or updated value in control it was a big concern? So what I had done is just create one random number and append it at the end of URL so every time new http request will be different in browser and it will not run from cache.

So now how to generate a random number?

Lets begin by looking back. As discussed in this post to generate a random number in JavaScript, the code:

var randomnumber=Math.random();

Math.random(x)
                  This is the function which will return next random number between 0.0 to 0.999999 so this will generate decimal number every time. If we require integer number then we can convert it using either round or floor function.

Math.round(x)
                  The round() method rounds a number to the nearest integer.

Math.floor(x)
                   The floor() method rounds a number DOWNWARDS to the nearest integer, and returns the result.

So finally we can use it as like this


randomnumber = Math.floor(Math.random());
or

randomnumber = Math.round(Math.random());

it will return value between 0 to 9


read more

Apr 27, 2011

The New Google Analytics Available to Everyone

0 comments

The New Google Analytics Available to Everyone

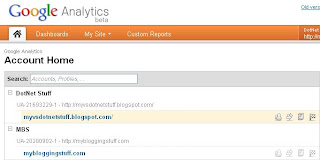
Hey Google has recently launched the newer version of the Google Analytic to track the site or blog traffic.

I am very happy after seeing the newer version of Google Analytics and Google has announced that it is in beta stage and available to every user in all the languages.

New look of the Dashboard


How to check newer version of the Google Analytics

Sign in to your Google Analytic and see the link at top right of your account

Check below screen shot for more details.


New version of Google Analytic has some enhancements as below.
  • A redesigned Google Analytics platform to enable major new functionality
  • A streamlined interface to make it easier to get to the information you want
  • Improved report performance for faster reports
Currently, we are showcasing the following features in the new version of Analytics:
  • A completely redesigned, faster interface.
  • Multiple dashboards—build a custom dashboard for each department.
  • Event Goals! Track your PDF downloads as goals with events, or configure 2 minutes play time on a video as a goal.
  • More powerful custom reports—you can pre-filter reports and build additional data views.
  • New Term Cloud visualization.

Some features will be introduce in Google Analytic very soon as below

  • Exporting reports to PDF
  • Emailing reports
  • Migrating a custom report from the current Analytics version to the new version
  • Linking a new AdWords or AdSense account
  • In-Page Analytics
For more details please go to here

Some screen shot from new analytic


read more

Apr 24, 2011

List of All Built-In / System SQL Server Stored Procedures

0 comments

Hey today I was searching for some system procedures to get system data and I found that on MSDN there is a list of all the native/system procedures with explanation.

It took some time for me to get the exact stored procedure what I was searching for so I thought it will help others as well so I am giving you a link of that MSDN page...


but remember that some times on MSDN link will change (Broken link). So might be when you read this it's broken if it is so just let me know my providing comment at the bottom of the post.


Thanks.

read more

Apr 14, 2011

Disable Back Button in Browser using JavaScript

10 comments

 While we are developing any web application then some times it's necessary to disable the back button effect from the browser. This is common in banking websites and other sites where security is major concern. User may hit the back button from the browser and forget to log out from the site.

There fore it's required to disable browser's back button.

So here is the code which will prevent user to go back on previous page.
<html xmlns="http://www.w3.org/1999/xhtml" >
<head runat="server">
<title>New event</title>
</head>
<SCRIPT type="text/javascript">
window.history.forward();
function noBack() { window.history.forward(); }
</SCRIPT>
</HEAD>
<BODY onload="noBack();"
onpageshow="if (event.persisted) noBack();" onunload="">
<a href='page2.html' >Page 2</a>
</body>
</html>

Code for Page 1.


<html xmlns="http://www.w3.org/1999/xhtml" >
<head runat="server">
<title>New event</title>
</head>

</HEAD>
<BODY>
Page 2
</body>
</html>

Code for page 2.

Here I have given 2 pages page 1 and page 2. From page 1 I am going to page 2 using page 2 link. Now if I will click on page 2's browser back button it will go to page 1 but from page 1 it will again forward to page 2 so user can't go to the page 1 using back button.

Note : Above code is tested in IE 9.0 and Firefox 3.6.8

read more

Author Profile

Total Pageviews

Categories

Followers

 
Top Programming   Sites Technology Top Blogs Technology blogs Technology Blogs

Sponsors